Monday, July 30, 2012

150 Follower Blog Candy!


Sorry I have been so quiet lately.  I have been sick so no mojo for my crafting.  Boo!  Even with my absence I have hit 150 followers and I am so happy that I want to share some candy with all of you.  This candy is open to anyone who is a follower of my blog.  Please leave a comment on this post and I will choose a random winner next Saturday.  


The candy will be:
Aislinn Adams Impression Obsession floral stamp
Echo Park Everyday Eclectic 6x6 Paper Pad
Basic Grey Paper Cottage 6x9 Paper Pad
Copic Markers- B91 B93 B95 YG11 E13
Distress Marker Brushed Corduroy
Memento Danube Blue and Bahama Blue Dew Drop Dye Inks
3 Dye Ink Spots


Over the weekend I had the opportunity to knock something off my bucket list.  I went to the NJ Festival of Ballooning and actually went up in a hot air balloon.  I was so scared because I am afraid of heights but I didn't let that stop me.  It was such an amazing experience.  Words cannot describe it!  The views were so beautiful.  I highly recommend doing it if you get a chance. And the bonus is I now have some amazing photos to scrapbook and I can use all of the Hot Air Balloon stamps and scrapbook paper I have been hoarding!


Tuesday, July 17, 2012

A Little Thank You


I had a blast over the weekend hanging out with my best friend Tasmine.  We worked on making thank you cards for her wedding.  It has been a year since we made her wedding invites together.  I can't believe how the time has flown by.  It is always nice when my non-crafty friends want to do a project.  When these little projects come up, I finally get to share my favorite hobby with them.

Saturday we went to Michael's and picked up some plain black cards on clearance.  They were embossed at the bottom with two lines and came 6 to a package with envelopes included for $0.99!  Score!  We picked up some American Crafts Silver Glitter Tape, recollections pearls and an EK Success Paper Shapers Layer Punch.  On Sunday we got together to actually make  all 42 thank you cards.  We stamped the couple's initials with some letter stamps by MSE on the smallest layer of the punch shape.  Then we put everything else together.  My small Xyron sticker maker came in very handy for those little pieces.  The $1 pink Revlon tweezer I bought that I thought would come in handy one day with my crafts, really helped me with adhering those tiny pearls quickly.


For the inside of the thank you card, we stamped a castle from an old Stampin' Up! set in Desert Sand Memento Ink and then stamped a Stampin' Up! sentiment over top in black.


We wanted to keep the theme from the original invitations (on a budget) and I think these ended up matching pretty well.

There's an App for that!


You know I love my iPhone and I am always looking for more crafty apps.  Well Tim Holtz has finally come out with one.  The Tim Holtz app is now available in the iTunes app store.  The best part is, it is free! 

"Now you can keep inventory of your favorite Tim Holtz signature products from Ranger, idea-ology, Sizzix Alterations, Stampers Anonymous, Tonic, and Core’dinations with this interactive app right at your finger tips. Create a wish list of the products you want to explore, and watch Tim’s technique videos right on your device. Keep up with Tim’s many adventures with quick access to his events calendar, blog, facebook, and twitter.”


You can see all the details here on the Tim's Blog. 


Thursday, July 12, 2012

More CHA preview goodness and a digi sale

CHA Preview:  Tell Your Story Collection by Teresa Collins

I am loving this collection too!  Peach and Aqua go perfect together...and it has butterflies.. This collection includes a lot, but my favories are the washi tape and hegagon stickers!!! Click the link above to enter the giveaway to win this collection.


ENABLER ALERT: Saturated Canary digis on sale!!!!


In the spirit of CHA,  Saturated Canary is having a digistamp sale. 

Get 30% off your order now through Saturday 11pm EST with code: CHALOVE. 

 Run do not walk...or I guess click your mouse and get over to the Saturated Canary online shop and get your digis.  They are too cute to pass up at  $2.80 each!


Wednesday, July 11, 2012

Summer CHA 2012 release: Glitz Design Hello Friend


It is that time of year again... previews of the new releases from CHA!  I am totally in love with the Hello Friend Collection by Glitz Design.  OMG! So so pretty.  I must get every part of this collection.  The collection is spot on trend right now from its Coral color theme to the Chevron washi tape and paper garland.  I can really see me using everything in this collection.  You can see the entire collection on the Glitz Design blog.

Tuesday, July 3, 2012

Coloring on Glitter with Copics and Copic Marker Storage


Today I wanted to share a technique I learned from Krazy Kreations at Scrapbook Expo.  It is called Coloring on Glitter...for lack of a better name.  I don't remember what they called it.  In their both they sold kits for this technique.  You can find the glitter starter kits here on their website and the stickers here.  

You start off with Elizabeth Crafts Peel Off stickers.  I used the cupcakes.  


Next you take the Be Creative Sticky Sheet (Sookwang sheet) and cut it to a size to fit your sticker.  Then peel the waxy paper backing off and smooth and burnish it down onto white card stock.


 Remove the other piece of backing off and sprinkle the Ritz Glitter onto the sticky area of your card stock.  Burnish the glitter into the sticky area and tap off excess.  You can use the backing paper to really press the glitter into the adhesive.


 Next take your sticker and peel off the silhouette.  


Adhere the sticker outline to your glitter.  


 Now you are ready to color in your image.  You can color directly onto the glitter.  It will not ruin your markers.  Just scribble off any stray glitter particles on a scratch paper when you are done with your image.  


 Trim your image and adhere to your card.  


And the final result!


Have you seen the new Jetmax Storage style at Michael's?  It is branded as Recollections but if you look at the actual pieces they say Jetmax on them.  This one has a drawer, two shelves and a removable marker holder.  I am using the marker holder separately on top of my current unit.  I mixed my Distress markers in with my Copics.  I was able to fit about 6 markers per slot so you can hold about 126 markers.


Here is what the finished shelf looks like.  


Saturday, June 30, 2012

Mixed Media Hugs


I'm back with a card I have been working on for a few weeks now.  The theme of the card was inspired by a book series I am currently reading.  It is called Madly by M Leighton.  The books are about a teenage Mer Princess who is trying to save her home under the sea called Atlas.  Of course I thought a mermaid card was fitting.  

My card uses a lot of different mediums.  I started off with a plain white tag and embossed it with a Tim Holtz Alterations bubble embossing folder.  Next I sponged on some distress ink in peacock feathers and tumbled glass and some faded jeans distress stain.  I spritz with some Turquoise Tattered Angels mist and then sprayed the entire thing with Shimmer Goosebumps.  That made it slick and shiny.  I stamped the swirl pattern in Scrap Happy glue and then sprinkled with fine glitter.   

Once I had my tag done I colored my stamped images with Copics and added some Frosted Lace and Patina stickler.  I applied the fish on my card with a foam dot.  I tied on some Twinery Twine

To make my background I applied Adirondack Acrylic paint dauber in Pool directly to my Solar White cardstock.  I stamped my sentiment in Teal Zeal Memento Ink.


Supplies- Stamps Sweet November Stamps Current Ebbtide digi, sentiment by Kanban Crafts
Copics: E000 E00 E21 E04 Y06 G43 G46 BG000 B000 BG02 BG45 R56 E08 E07 BV11 YG11 BG57

Friday, June 29, 2012

Scrapbook Expo NJ, thoughts on the day and Copic class


Today was the day.  Scrapbook Expo NJ 2012.  I went, I bought, I learnt, I bought, I sweated... I need a nap! 

 The day started bright and early and it was already hot first thing in the morning.  I lined up before the doors opened with a lot of other eager ladies.  We got some coupons and some freebies.  When they finally let us onto the show floor, I raced to my favorite booth: Scrapmart.  I didn't get much there.  I got some papers and a Copic refill, and some closeout Glitz Design products.  Love their stuff and Scrapmart had them in the bin for cheap!  I got two paper pads for the price of one in the bin as well.  I then ventured around the show to other booths, did some make and takes, and burned  through my hard earned cash.   All in all, there was not much new stuff that I saw there.  I got a bunch of things I have been wanting for a while but felt like I was missing out on all the hottest and newest things.  Prices were not competitive overall.  I was disappointed about that, but my fav local scrapbooking store Scrappers' Cove saved the day.  They had great show special pricing that was lower than everyone else.  I had to move quickly because I had a morning class.  I went across the street to the hotel for classes.  Dear god it was hot.  96 degrees!  Thank goodness they had a free shuttle with the AC cranking.

I took a class called Copic Intermediate with Krazy Kreations.  The class kit contained everything we needed to make 3 cards, Copic markers B91 B93 B95, and a flower stamp.  Of the 3 cards we made, the one pictured above was my favorite.  The two below were nice too.  The company offers some cool products including the plastic pouch and pebbles for the shaker card below.  The pouch is self adhesive so it makes shaker cards a snap.  They also told us about a demo going on in the booth on coloring on glitter with Copic markers.  I went back to the show to check out the demo and fell instantly in love with the technique.  I am vacation this week so I will be trying this method out and will share with you.  I also won a class prize, another Impression Obsession stamp.  Lucky me!  


I also picked up some new mediums today to try.  I got a few more distress markers and some new inks to go with them.  I bought Ranger Archival Ink and Faber Castell Stampers Big Brush which is India ink.  I saw a demo at The Rubber Cafe using the Big Brush colored onto a stamp and then stamped onto Canvas. They then used Gelatos to add color to the image.  Well you know I had to get some of those too.   I decided to do an ink test with both new inks to see how they color with Copics and Distress Markers.


Below is  how the test went.  The top two flowers are stamped with the Big Brush.  The Faber Castell Big Brush smudges when colored with Copics.  I tried it twice just to be sure that it wasn't a drying time issue.  The bottom two flowers are stamped with Ranger Archival Ink.  It works great with Distress Markers, no surprise since it is Ranger. I colored using a Victorian Velvet and Milled Lavender Distress Marker. The image on the right was colored with R08 ad R14 Copic Markers.  Archival Ink held up pretty well to the Copic markers.  There is a tiny amount of smudge in the center of the flower.  I believe if heat set, the ink will not smear.


All in all it was a really fun first day of my vacation.  I will be back tomorrow with a mixed media project to share with you.

Tuesday, June 26, 2012

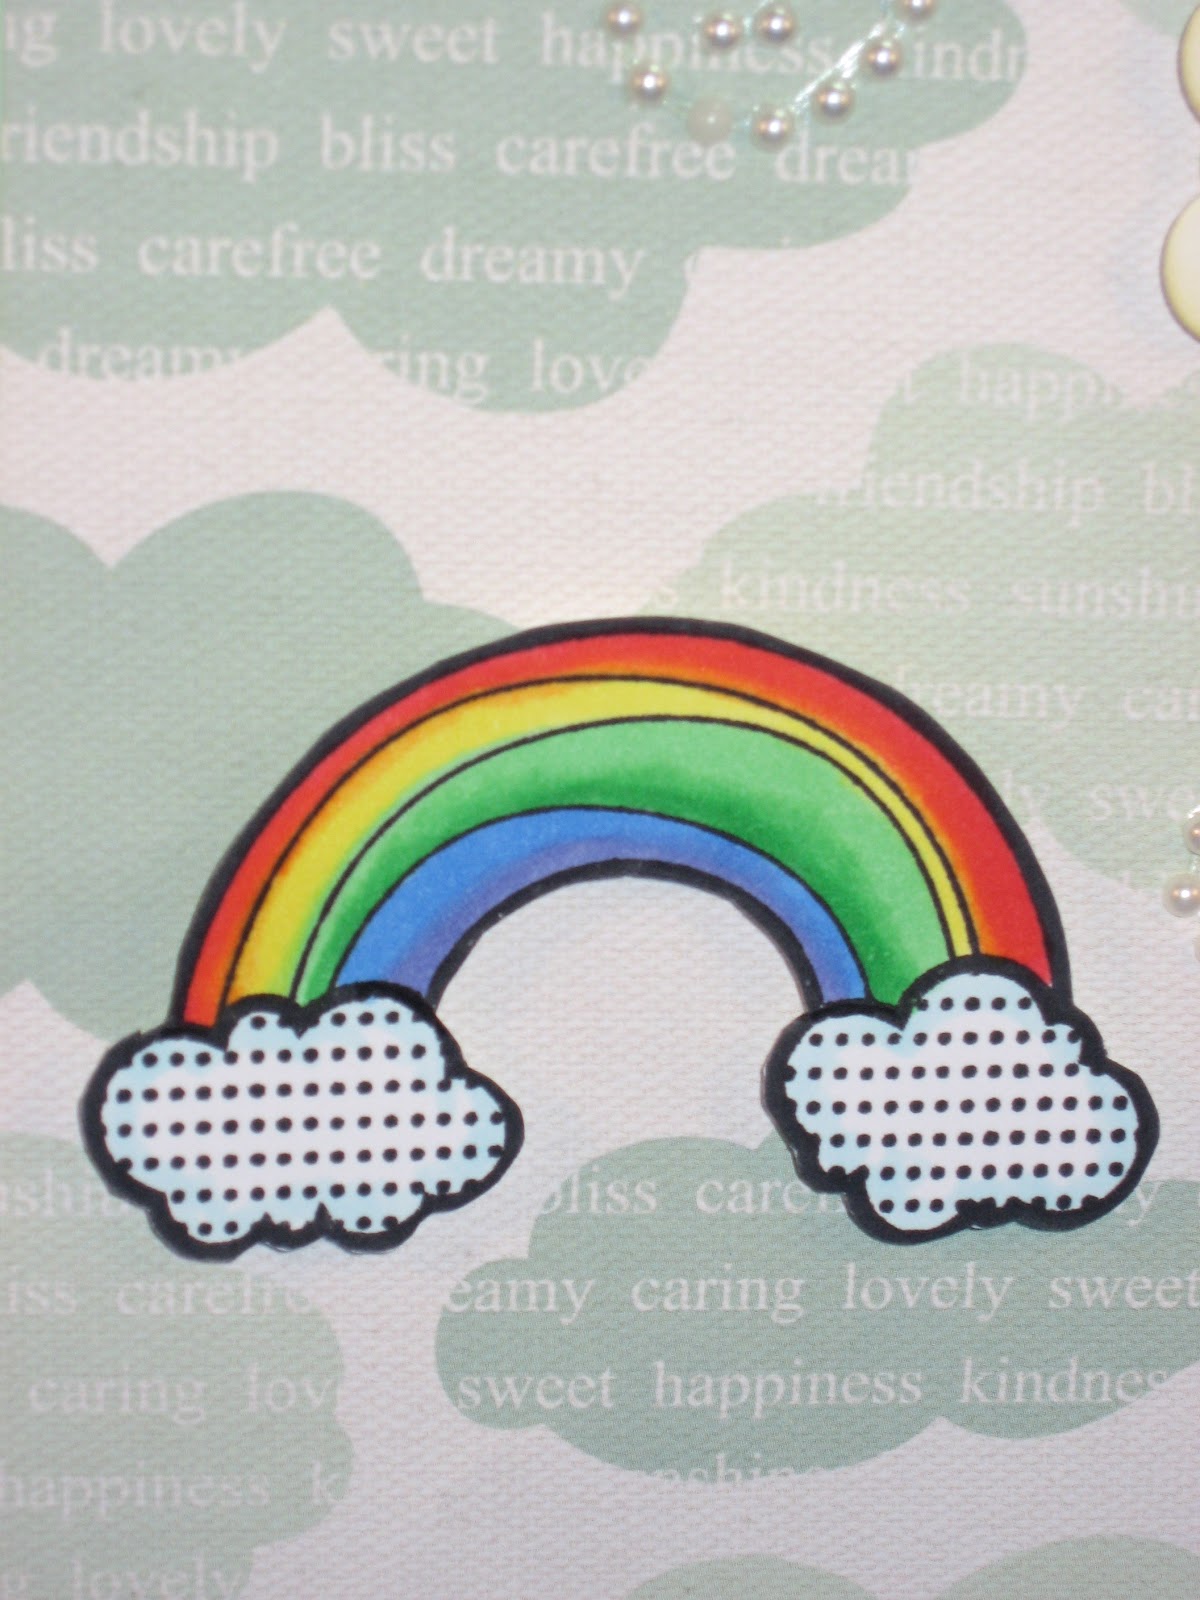
Count Your Rainbows


Happy Tuesday!  I wanted to share a quick card I made last - last weekend.  I have had this one done for a while, I just forgot to post it.  I have about 10 projects started right now and can't quite commit to one.  Does that ever happen to you?  I guess my mojo has an attention span problem. 

I found this cute American Crafts rainbow stamp and cloud paper by Echo Park at a store I discovered in New York City a few weeks back.  It is called Paper Presentation and it is down on 18th Street off of 5th Ave.  You can't tell from their website, but they have a whole scrapbooking section with a nice little sampling of products.  They have been there for years and I never knew about the store.  I am so sad.  It would have been much easier to get there when I was working downtown.  Now that I am working in midtown, it takes much too long to get there during my lunch hour.   I can't be sneaking out to go there very often.  Sigh. 

Hopefully I will find some really great things this Friday at Scrapbook Expo in Somerset NJ.  I am so excited.  I will be there bright and early and signed up to take a Copic class while I am there too. 

Supplies-
American Crafts Rainbow Stamp,Inkadinkadoo Friendly Advice Kid's Quotes stamp, Echo Park Sweet Day Up, Up and Away Paper, Solar White 5 X 7 Cardbase, Pastel Bristol, Want to Scrap Pearls, Memento Tuxedo Black Ink, Tim Holtz Antique Linen Distress Ink, PTI die, Foam dots
Copics: R24 Y13 G02, G05, B000, B24, BV13


Wednesday, June 20, 2012

Summer Distress Ink Part 2: A Tutorial


Hi Y'all!  I am watching Dallas so this greeting seamed fitting.  I am back with part 2 of my Summer Distress Ink post.  I wanted to share how I made my Tim Holtz inspired tag.

To do this you will need the following supplies:
1 White Card Base ( I have used a 5x7 Solar White Card Base)
1 Manilla Tag ( I have used the Inksentials Manilla Surfaces tag)
Tim Holtz Summer Distress Inks (Mowed Lawn, Salty Ocean, and Picked Raspberry)
Tim Holtz Distress Stain in Picket Fence
1 Minimister Bottle- filled with 1 part Perfect Pearls and 3 parts Alcohol
Heat Tool
1 Spray Bottle filled with water
Ink Blending Tool
Sandpaper/sanding tool
Waterbrush
1-2 Bold Stamps (I have used Teresa Collins Spring Fling stamps)
1 Open Line Image Stamp
Craft Sheet
Bakers Twine
Stapler


 Crumple up your tag twice then unfold and smooth out.  Sand it a bit to distress the surface.


Swipe some ink from all three ink pads to your craft sheet.  


Place your tag over the ink and smoosh it around and swirl it through the ink to your liking.


Spritz your tag with water.  

Apply more ink to the craft sheet and spritz with mini mister with perfect pearl/alcohol mixture.  Smoosh and swirl your tag in the ink again.  


Dry the tag with your heat tool.

Ink the edges of your tag with Ink Blending tool.  I used Pink Raspberry.  


Apply Picket Fence Distress Ink Stain to an acrylic block or your craft sheet.


 Ink your stamp with Picket Fence stain.


Stamp your image onto tag in Picket Fence Distress Stain and then stamp your image with Salty Ocean Distress Ink overlapping to create a ghosting effect.


Finish your main background for your card by stamping an image in Pink Raspberry Distress Ink onto white card base.  Fill in the image with Pink Raspberry Distress Ink applied with a water brush.  Ink the edges of your background with Mowed Lawn Distress Ink.  

Tie some twine through the hole in your tag and then adhere the tag to your card base.  I folded the edge of my tag over and applied some Salty Ocean ink with blending tool then stapled the edge.  Stamp sentiment onto card base in Salty Ocean.


Embellish your card as desired.  I added some Kaisercraft pearls to the flower centers.

Happy Mother's Day Card

MICHELLE'S MBELLISHMENTS Happy Mother's Day Card A fun fold design featuring the Boutique Blossoms Bundle This week's card was a...